Showing posts with label Section 26. Show all posts

Friday, June 17, 2016

Section: 26
Hours: 3

This morning I finished up riveting the baggage ribs to the bulkhead. I used the long bent stick in the rivet gun to reach these rivets.

The routing angles get in the way for riveting the center ribs. It took some real finessing to set the rivets in the inboard ribs.

I set the assembly on end on blocks on the floor and clecoed the baggage ribs. Tomorrow I hope to get some help riveting them to the skin.


Section: 27
Hours: 3

This afternoon I pulled the parts for the firewall assembly and started work filing, deburring, counter sinking, etc.

Thursday, June 16, 2016

Section: 26
Hours: 7.5

This morning Deb helped me rivet the fuselage bottom skin to the seat ribs. Easy work with two people but as Deb said "boring". Lots of rivets.

This afternoon I was presented with a bunch of difficult rivets. Here I'm using my thin titanium bar backed by a heavier bar to set some rivets in the side frame assembly.

The aft gear brace assembly gets pop riveted to the seat rib. It was really difficult to get the pop rivet gun on the bottom rivet. After trying out many positions on both sides of the rib, I was finally able to get a grip on the rivet by sliding the tool through the lightening hole of the outboard rib.

The power outlet bracket has rivets in the 4 corners that I was able to set using the squeezer. I had to use my inspection mirror to inspect the shop heads because they are hidden under the side flanges.

I riveted in the baggage area step assemblies and then clecoed in the middle baggage ribs with the seat belt lugs to finish off the day.

A nice detail is the seat belt lug brackets slide through holes in the bulkhead frame. I love the way all these parts fit together. Van's does an amazing job of engineering and manufacturing.


Wednesday, June 15, 2016

Section: 26
Hours: 5

I back riveted the gear brace assembly to the bottom skin and then mated the skin to the seat rib assembly. I was going to back rivet the skin to the seat ribs, but I discovered that wasn't really practical because of the slight curvature on the bottom of the ribs. I clecoed the assembly together and I'll get someone to help me rivet tomorrow.


I finished up today assembling the doublers and nut plates to the step attach ribs. The RV14 tail dragger version doesn't have a step, but you need these ribs to support the floor.

Tuesday, June 14, 2016

Section: 26
Hours: 5

I got back to riveting today. Nice change from P&P (prep and paint). Here's the seat belt attachment lugs. These few rivets are what will keep me in my seat in turbulence and acro flight (or other sudden delta v situations)!

The idler brackets require a 45 degree bend after you rivet in the nut plates. I used my duck bill pliers for this job. I drew a pencil line 1/4" in from the edge to guide placement of the pliers and made multiple passes to gradually bend the flange to the final set.


The bearing for the idler bracket needs to be trimmed so it doesn't protrude. I built a simple holder out of some scrap MDF board. First I layed out a center.

Then I drilled a hole with a 3/4" wood spade bit. I inserted the bearing, traced around it with a pencil and then layed out the trim line.

I pinned the bearing to the holder using a cleco and then ran the assembly through my bandsaw. The drawing in the manual shows the trim line running just below the top hole, my line ended up a little short of trimming off the top hole, so I adjusted the fence in a little and made a second pass to clean up the edge just even with the top hole.

Here's the assembled idler bracket.

I used the rivet gun to set the rivets for attaching the idler bracket to the bulkhead.

I back riveted doublers and some stiffeners to the fuselage bottom skin. The plans called out for some
AN460AD4-4.5 length rivets but none that length were included in the kit, so I used some 5 length rivets. It was a little difficult getting them to shoot without leaning over, but after a couple retries I adjusted the air pressure and got ok results.

The last project for the day was assembling the gear brace assembly and seat rib angles. The angles are supposed to be 90 degrees to the brace. You partially set the upper rivet, adjust the angle and then clamp and shoot the other rivets. I initially used a cleco for clamping, but the angle moved when I squeezed the rivet. I drilled out the rivet, reset the alignment and then clamped using a cleco clamp and was then able to squeeze the rivets without the angle moving.

Monday, June 13, 2016

Section: 26
Hours: 8.5

Today was a long day. I washed, acid etched and then primed the rest of the parts for section 26. Last week I looked at my neighbor's Bearcat project. He's using EkoPrime to prime all his parts (the same as I'm using). I noticed his prime coat was nice and smooth and asked him how he does it. He said the key is thinning the EkoPrime with distilled water. I've been shooting paint straight out of the can, which worked well in cooler weather, but my last couple batches have been coming out with a rougher finish. Today I thinned out the primer about 10% and it shot much smoother. I also discovered that the main orifice on my gun had gotten clogged with built up paint. I thoroughly cleaned the gun and got a much better spray pattern. Between the thinning and cleaner gun the painting part of the project today went much faster. Now if I could just figure out how to speed up the washing and acid etch scrub I'd be a happy camper :-)


Sunday, June 12, 2016

Section: 26
Hours: 5

I continued prepping parts for this section. It's amazing how many small parts there are in the fuselage! Each part gets edges filed and polished on the 3M wheel. Holes are deburred and possibly dimpled. A careful reading of the plans is required to figure out which holes to dimple and which to leave flat. I am finding it is better to group this work together because it is more efficient to wash, acid etch and prime a lot of parts together due to the set up and clean up time for using the spray gun.

Wednesday, June 8, 2016

Section: 26
Hours: 7

Today I spent prepping parts, including dimpling the center bottom skin. I spent most of the afternoon dimpling the bottom skins. Initially I couldn't tell which side of the skin was the bottom. 99% of the holes are symmetric. It turns out that there are several drain holes on one side that aren't duplicated on the other side.  The drain holes are shown on page 26-11 and labeled with "do not dimple" and they go on the right side of the center line. This allowed me to orient the skin and figure out which side was the bottom for dimpling.
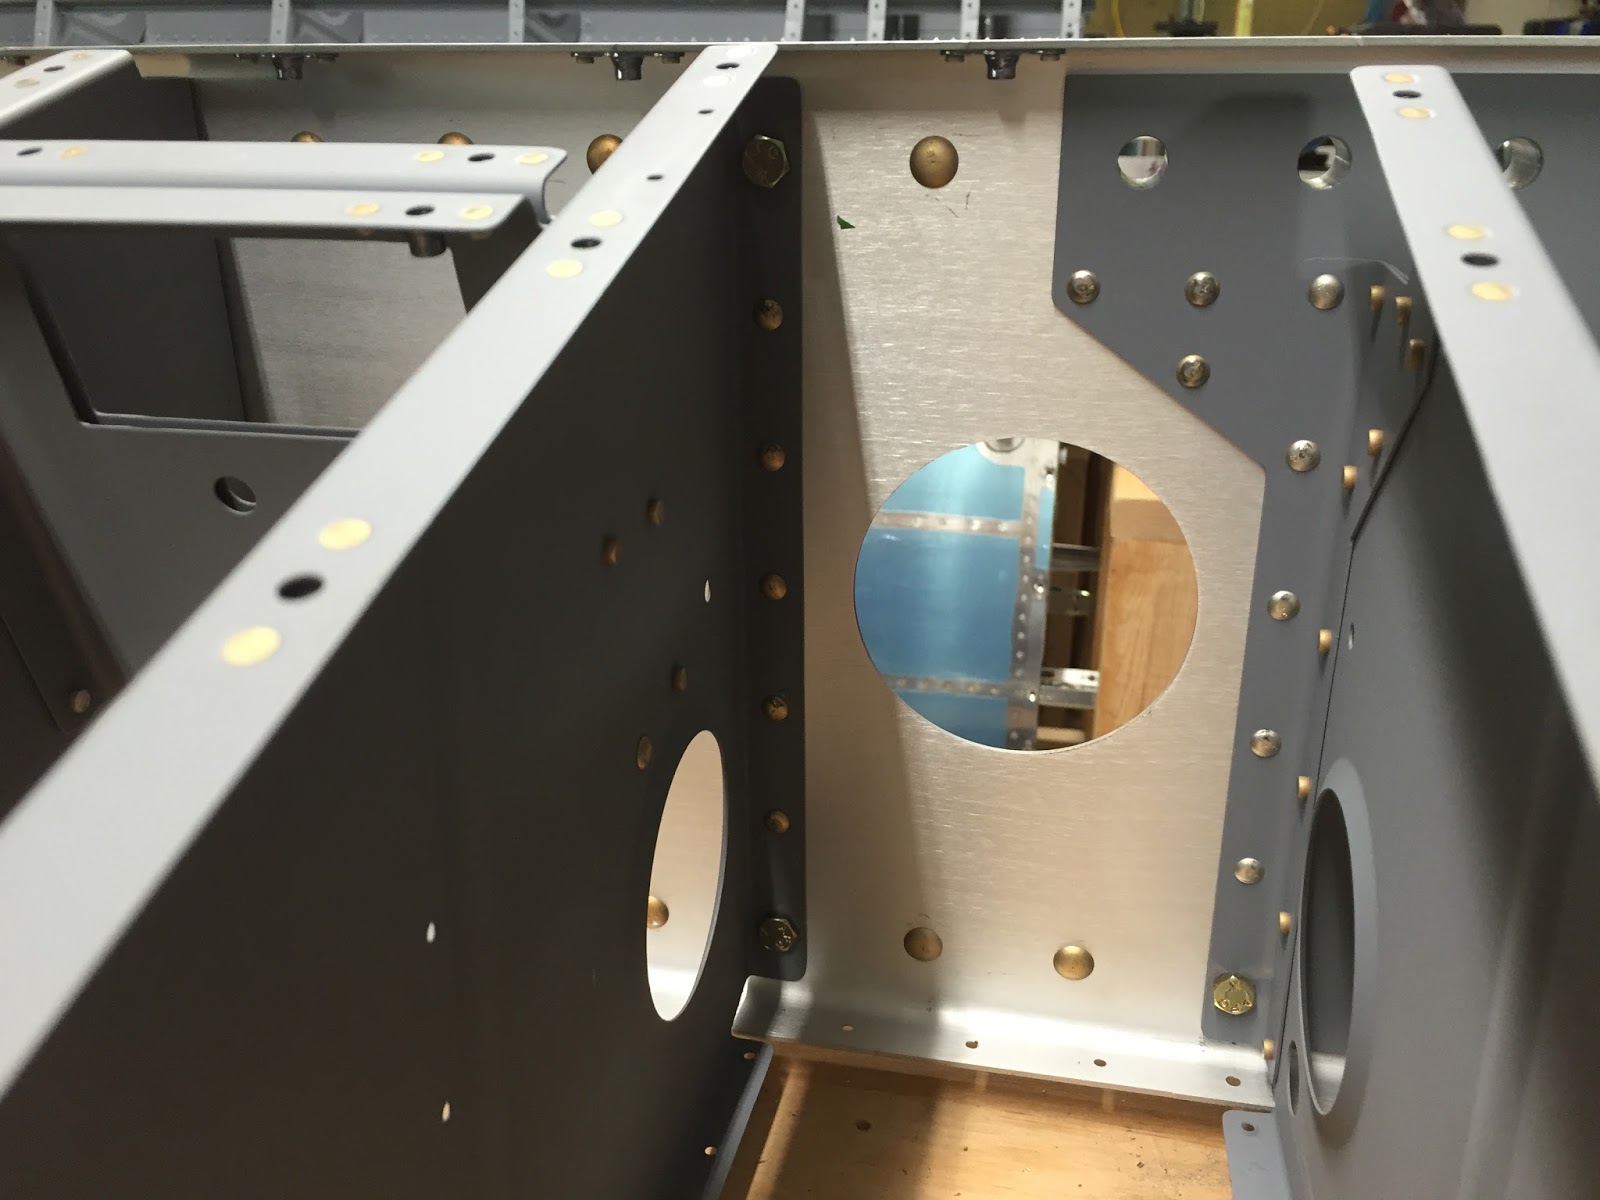
Tuesday, June 7, 2016

Section: 25
Hours: 2

I had put off finishing the bulkhead bottom channel because the plans call out to use "temporary nuts" on the bolts. The order of temporary hardware from Aircraft Spruce arrived late yesterday so I was able to complete the work on the bottom channel this morning. Each hole was reamed out by pulling the reamer through the hole from the back and the bolts were torqued down to book values using the temporary nuts that will be discarded later.


Here's the bolted up bulkhead bottom channel.
Section: 26
Hours: 5

I'm back to prepping parts for the next section. Lots of filing, grinding, polishing, deburring, dimpling, etc.

Monday, June 6, 2016

Section: 25
Hours: 3

Today I finished up the forward center section bulkhead assembly. I bolted and riveted in the bearing bracket braces.

Next I reamed out some bolt holes. I inserted the tail of the reamer in the forward side of the bulkhead (left side in pic below) and carefully pulled it into the hole stopping just before the cutting face reached the hole. Then I dabbed Boelube on the cutting face and chucked the reamer into the drill. Then I pulled the reamer through the hole (towards the right in the picture). I wiped down the reamer between each hole and ran the drill at a slow speed. The holes turned out very smooth.

Section: 26
Hours: 5

I used the squeezer to set the rivets for the baggage rib doublers. I also riveted nut plates, clips, routing brackets and crotch belt brackets to the seat ribs (not shown).

Then I bolted and riveted the seat ribs to the aft center section bulkhead. All the riveting was done using the long bent stick in the rivet gun to reach the rib flanges. I found it was easiest to camp the bulkhead to the table and shoot the rivets horizontally.


I torqued all the bolts and dabbed torque lock (bright orange paint) on each nut.

Tuesday, May 31, 2016

Section: 26
Hours: 6

I primed two batches of parts today. I did the first batch before lunch.

 I cleaned up the gun and had lunch and then shot the second batch.

By the time I finished the outside air temperature had reached 100! Shooting paint with the bunny suit, rubber gloves and mask on when it's this warm isn't much fun. The gloves filled with water (sweat) and I had to be careful to not dribble on the painted parts. It was very nice to get the gear off and rehydrate!

Monday, May 30, 2016

Section: 26
Hours: 9

Today I washed and acid etched the parts I've been prepping the last week. Whew! Tomorrow morning while it is still cool I'll get out the spray gun and prime the parts.

Sunday, May 29, 2016

Section: 26
Hours: 4

I continued prepping parts for the fuselage.

The outboard seat rib requires fluting to curve the rib to fit the contour of the fuselage. This is the first fluting I've done to add a curve instead of removing one :-)

Saturday, May 28, 2016

Section: 26
Hours: 6

I continued pulling parts and doing prep work. I used the die grinder with the small scotch brite disks to smooth out all the interior holes. There are just a lot of parts to get ready for prime paint next week.